It is irritating when you can’t focus while dealing with your PC. There are situations when clients see their screens glimmering on their Windows 11 PC and lose their focus. Screen glinting or gadget screen squinting on and off happens when there are abrupt and noticeable changes in the brilliance of your screen show.
There can be different motivations behind why your Windows 11 PC encounters a screen glimmering issue. It very well may be because of flawed equipment or a bad presentation or designs driver. While it requires a long investment to sort out what might be the matter with your PC or work area PC, perhaps the most ideal way you can do is to attempt to investigate and fix it. Look at the arrangements underneath to begin.
Fixing Screen Flickering or Blinking On and Off Problem on Windows 11 PC
These techniques underneath may investigate your screen glimmering issue contingent upon the reason for the presentation issue. You can attempt to follow every arrangement under each in turn and check assuming that it works for you.
Arrangement #1 – Check your PC Hardware
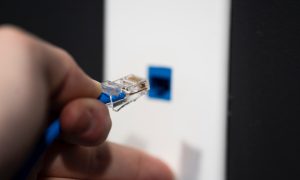
Ensure that the links are not free or harmed. Really take a look at your screen and check whether there are any indications of issues. You can attempt to turn off and replug the links on your screen. Another way is to attempt to plug your screen links into an alternate port.
Arrangement #2 – Test your Task Manager
One of the ways of sorting out what causes the mistake is to really look at the assignment chief. Open the Task Manager on your Windows 11 PC by squeezing Ctrl+Alt+Delete. On the off chance that the Task Manager is flashing, the issue might accompany your presentation driver. If not, it very well may be expected to an incongruent application.
Arrangement #3 – Roll Back your Display Driver
- Send off the Search menu of your Windows 11 PC.
- Search for the Device Manager.
- Click the Device Manager.
- Explore to Display Adapters and grow the menu.
- Right-click on the connector.
- Select Properties.
- Go to the Driver tab.
- Pick Roll Back Driver.
- Click Yes.
- Reboot your PC.
Arrangement #4 – Update your Display Driver
- On the Device Manager, explore to Display Adapters.
- Right-click on the connector.
- Select Update.
Arrangement #5 – Choose a Different Refresh Rate for your Windows 11 PC
- Open the Settings menu.
- Select System.
- Pick Display.
- Look down to Advanced Display.
- Search for the choice Choose an invigorate rate.
- Change the invigorate rate through the container close to it.
Arrangement #6 – Reinstall your Display Driver
- Open the Device Manager.
- Go to Display Adapters.
- Right-click your connector.
- Select Properties.
- Actually take a look at the crate close to Delete the driver programming for this gadget.
- Click OK.
- Restart your PC.
Arrangement #7 – Uninstall the Problematic App
Assuming you know what application might be causing the blunder, you can uninstall it.
- Send off the Settings menu of your Windows 11 PC.
- Go to Apps.
- Select Apps and highlights.
- Search for the application that you need to uninstall.
- Click Uninstall.
- Click Uninstall once more.
- Pick Yes.
- Restart your gadget.
- In the event that the application isn’t causing the issue, you can reinstall it through the Microsoft Store.